Contents
Install Micro Link Hair Extensions
Micro-link hair extensions present an excellent method to revamp your appearance, infusing length, volume, and a hint of sophistication into your locks. If you’re keen to master the proper technique for wearing them and achieving a seamless, natural look, you’ve come to the right spot. In the subsequent guide, we’ll outline the step-by-step process of installing micro-link hair extensions, ensuring you can effortlessly elevate your hairstyle with confidence.
Installation of Micro Link Hair Extensions
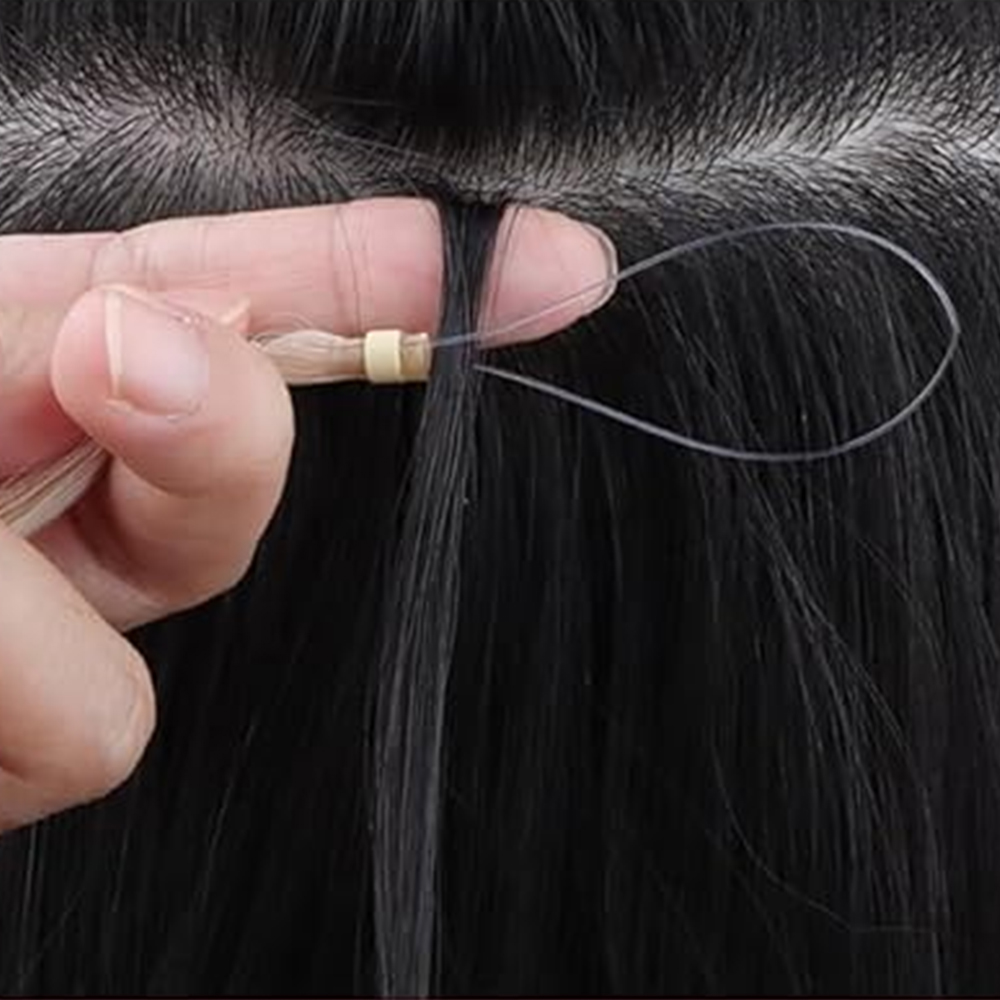
1.Pull the ends of your hair through the plastic loop.
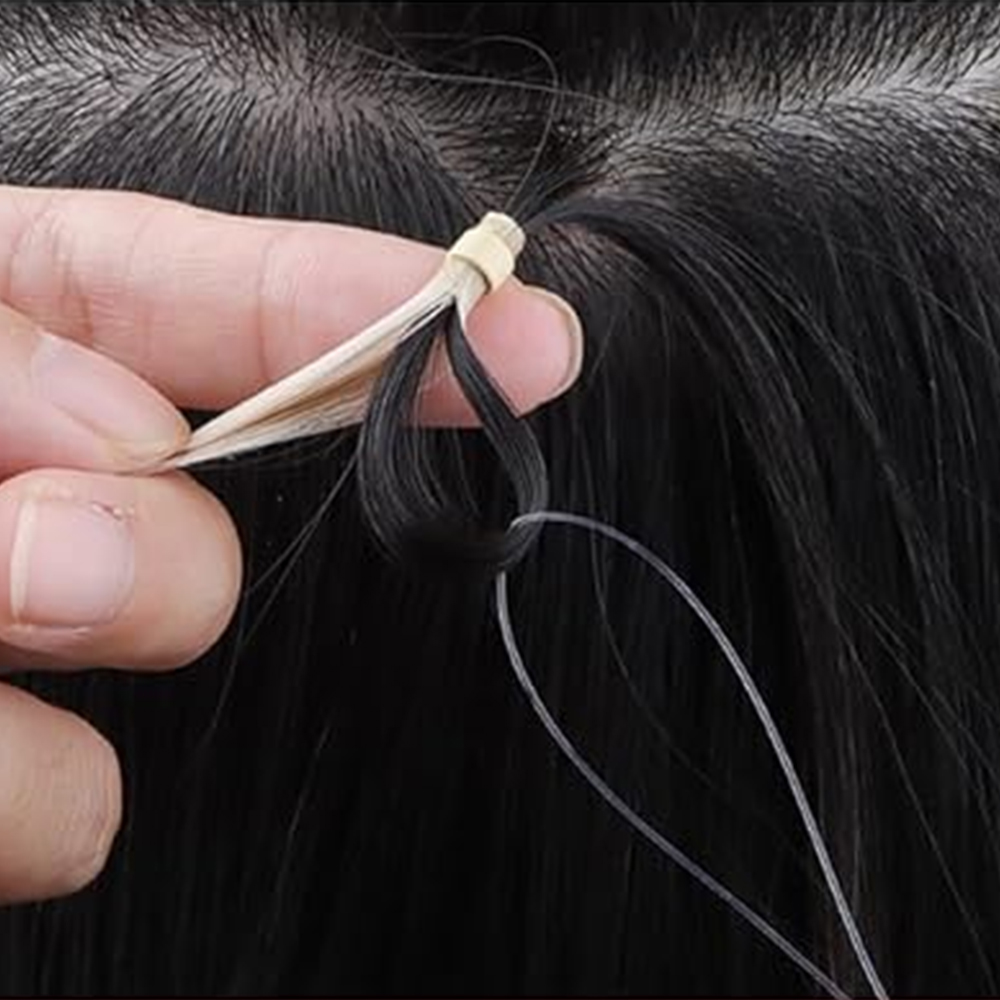
2.Thread your own hair throuth the micro ring.
3.Pull the ends of your hair through the plastic loop.
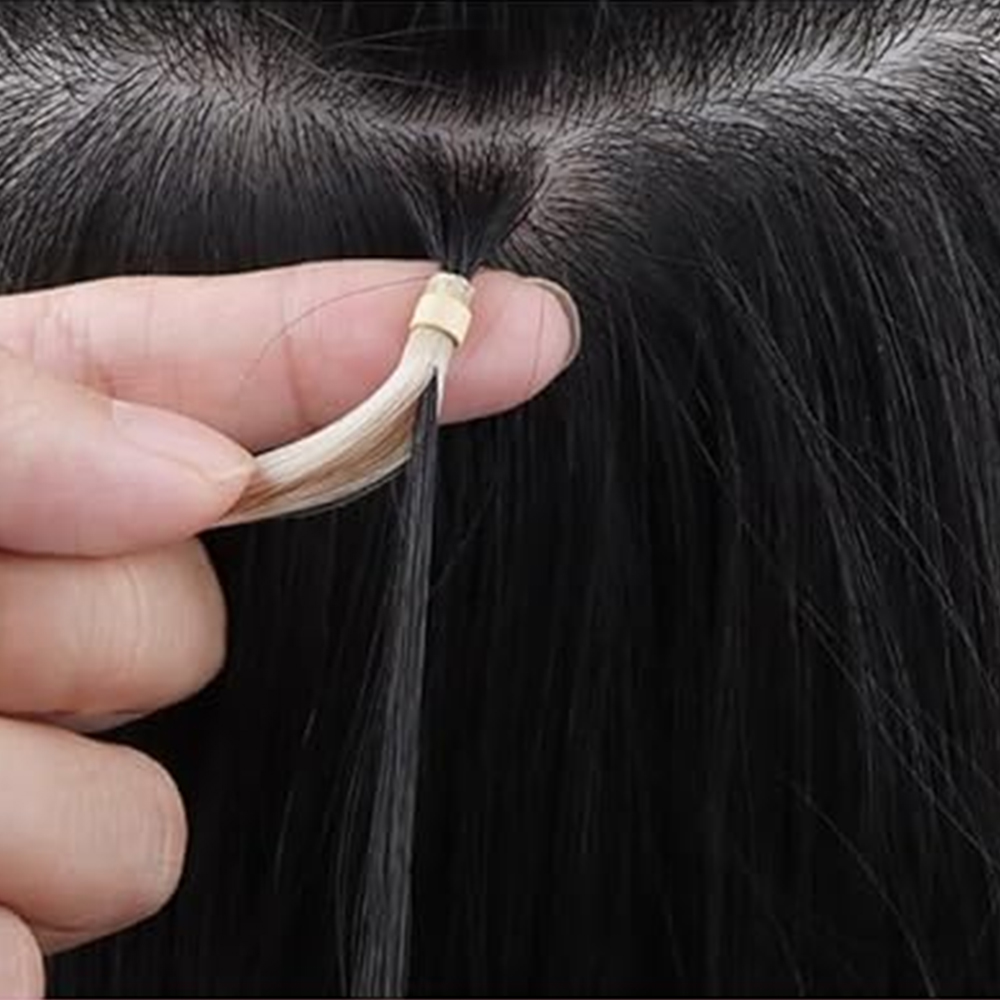
4.Thread your own hair throuth the micro ring.
Video for How to Install Micro Link Hair Extensions
Wearing Precautions for Micro Link Hair Extensions
1. Pre-installation preparation
Before installing micro link hair extensions, ensure natural hair is thoroughly cleaned and completely dry. Oily or damp hair reduces the grip of micro rings, risking instability in micro link hair extensions. Use a fine-tooth comb to detangle hair, and inspect each micro link strand for intact keratin bonds to prevent premature shedding.
2. Step-by-Step installation guide
- Sectioning Hair: Divide natural hair into small, 1-inch sections starting from the nape. Secure upper layers with clips to focus on each section, ensuring even distribution of installing micro link hair extensions.
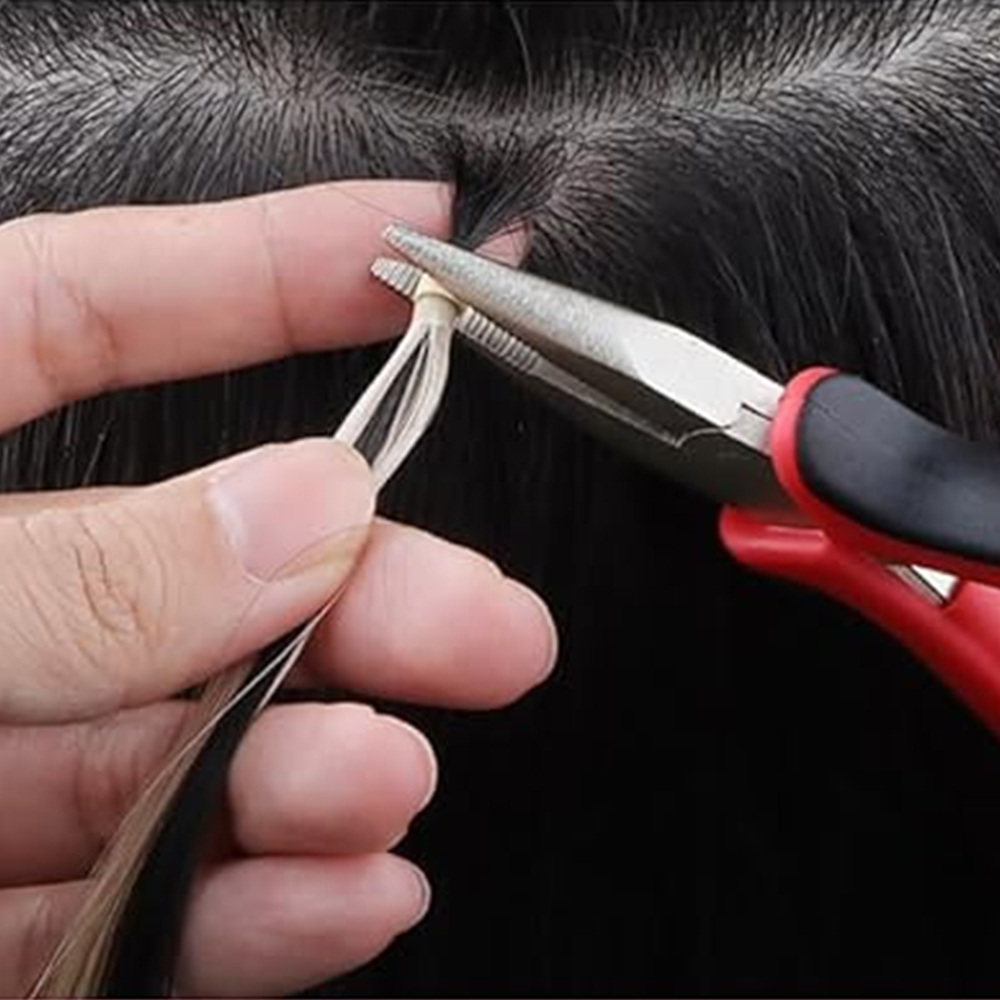
- Threading Micro Rings: Place a micro ring on a threading tool, then capture a thin strand of natural hair and a micro link hair extension strand. Guide both through the ring, positioning it 0.5–1 inch from the scalp to avoid root tension.
- Clamping Precision: Use micro link pliers to crimp the ring gently but firmly. Over-clamping can cause hair breakage, while loose rings may make micro link hair extensions slip out.
3. Post-installation maintenance
- Initial Care: Wait 24–48 hours before washing hair to let micro rings set. Moisture immediately after installation weakens the bond between rings and hair.
- Daily Detangling: Gently brush micro link hair extensions with a wide-tooth comb, starting from the ends to prevent pulling on micro rings. Avoid vigorous brushing that could dislodge attachments.
4. Styling Tips & longevity
- Heat Styling Limits: For human hair micro link extensions, use heat tools below 150°C and apply heat protectant. Excessive heat damages keratin bonds, compromising the security of micro link hair extensions.
- Regular Inspections: Weekly check micro rings for looseness or corrosion. Tighten or replace worn rings promptly to maintain a natural look and prevent unexpected shedding.
5. Safe Removal & scheduling
- Gentle Removal Process: Apply bond remover oil to micro rings, wait 2–3 minutes, then use pliers to expand rings gently before sliding them off. Avoid force to prevent natural hair damage.
- Maintenance Cycle: After installing micro-link hairextensions, adjust the micro-link extensions every 8 to 12 weeks to accommodate hair growth, ensuring the micro-link hair extensions remain comfortable and secure at all times.
Following these precautions keeps micro link hair extensions seamlessly integrated, minimizes damage to natural hair, and prolongs their lifespan for a versatile styling solution.
We hope this article helps you install micro link hair extensions accurately and provides you with a positive experience.
Please contact us if you have any questions about our hair products or need assistance in making the right choice for your hair extensions!
(blog)
You may like these: