
Contents
How to Install Clip Ins
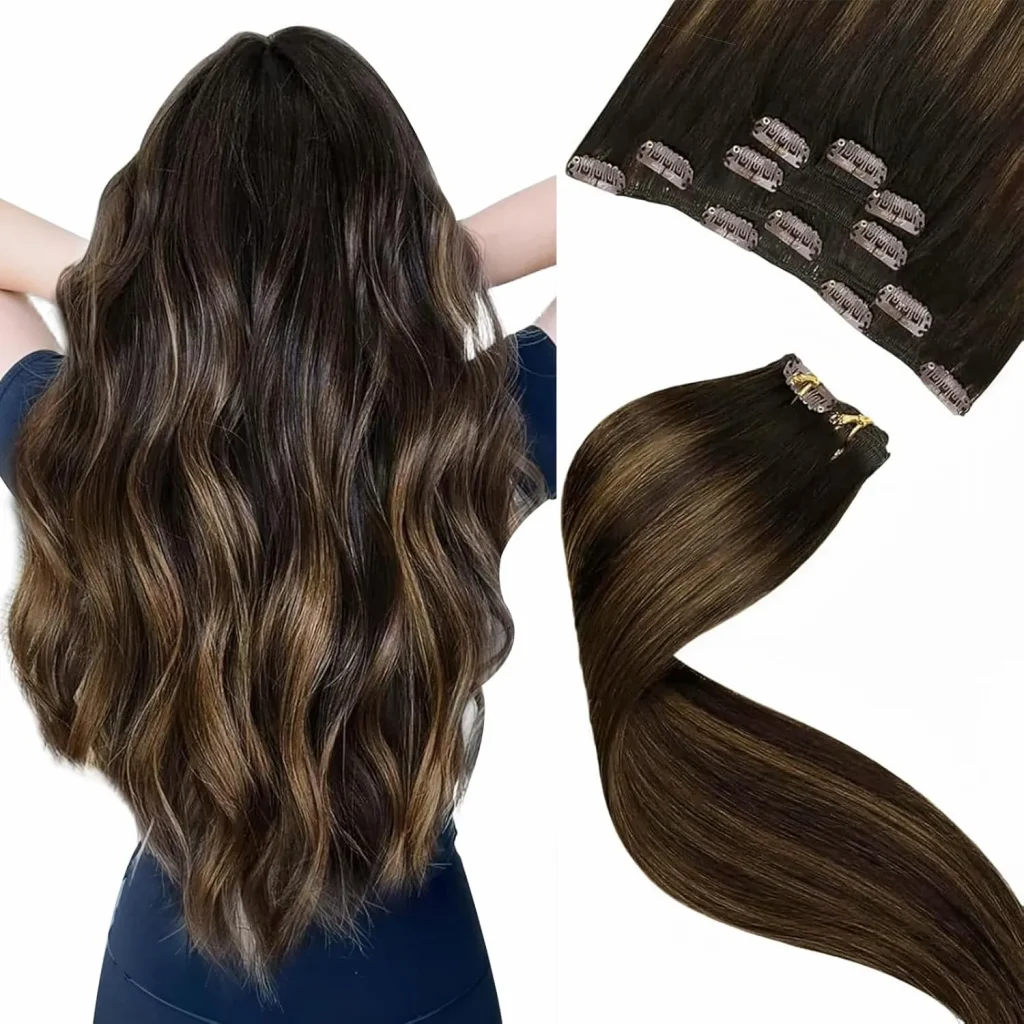
Summary:This guide provides clear instructions on how to properly install and care for clip-in hair extensions. It covers preparation, step-by-step installation, and essential aftercare tips to ensure a natural blend, secure fit, and long-lasting results. Proper maintenance and usage, including washing and limiting wear time, can help extend the lifespan of your extensions.
Steps to How to Install Clip Ins
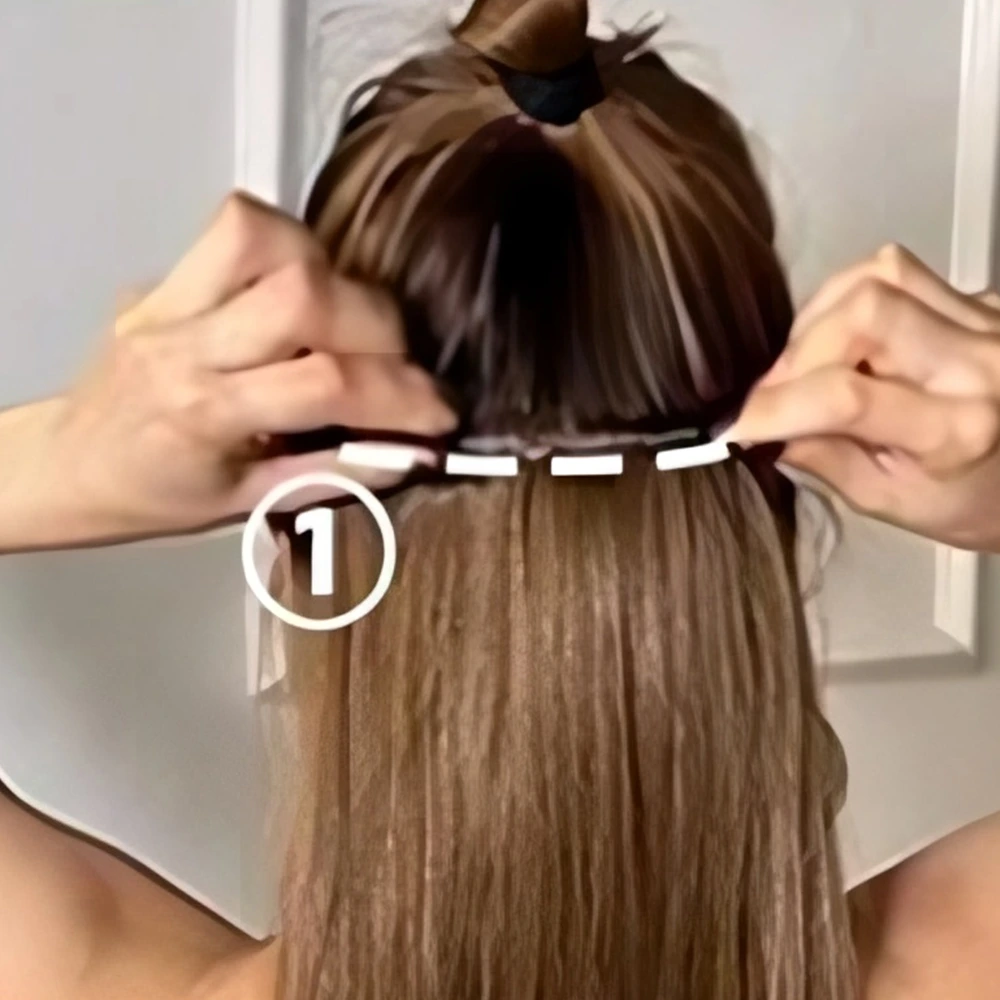
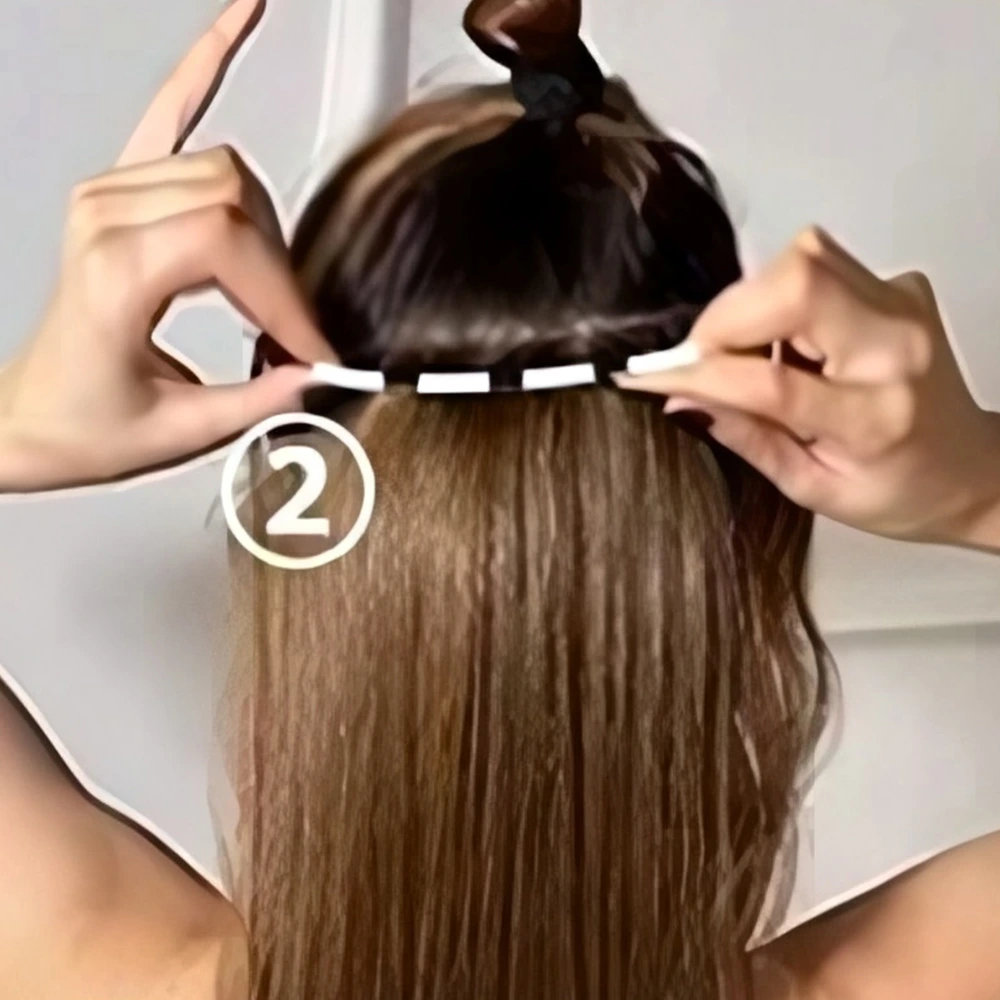
Tie your hair into a small ball
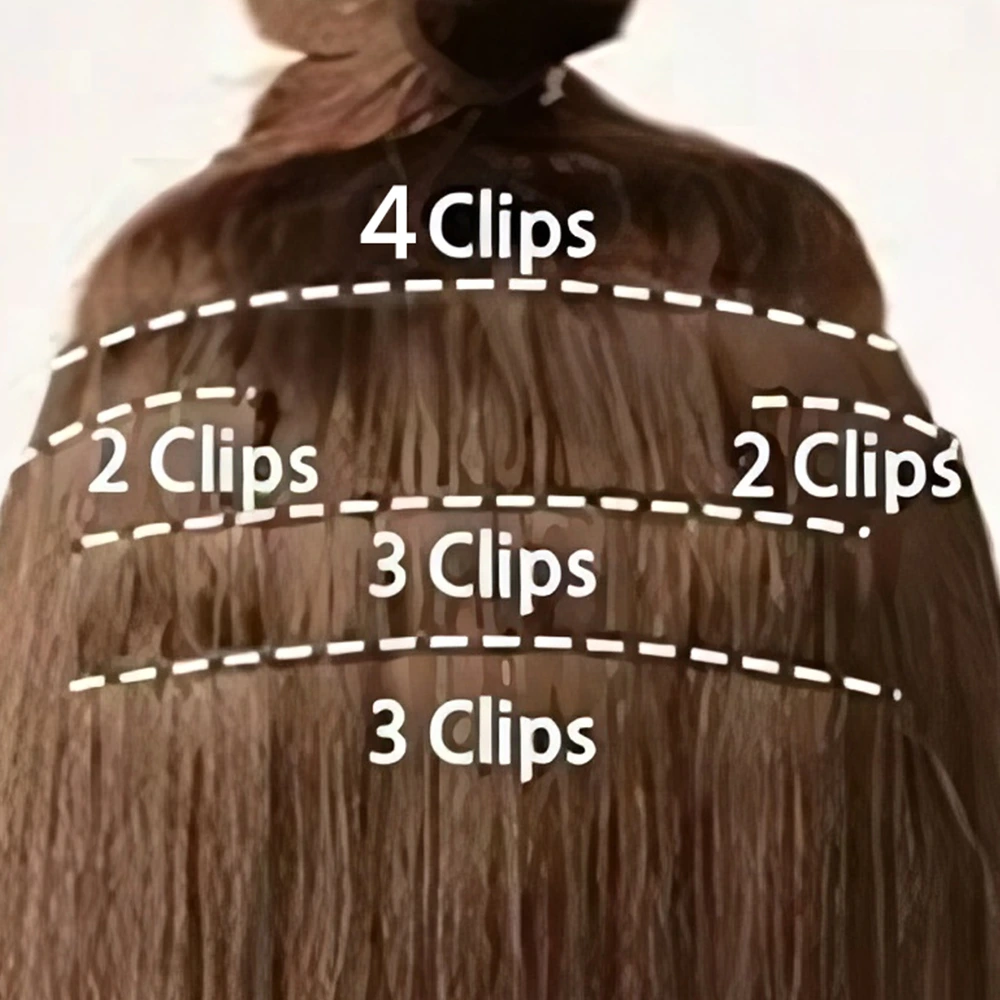
Wear 1 PCS 3 Clips, in the lower place
Wear other one in the upper place
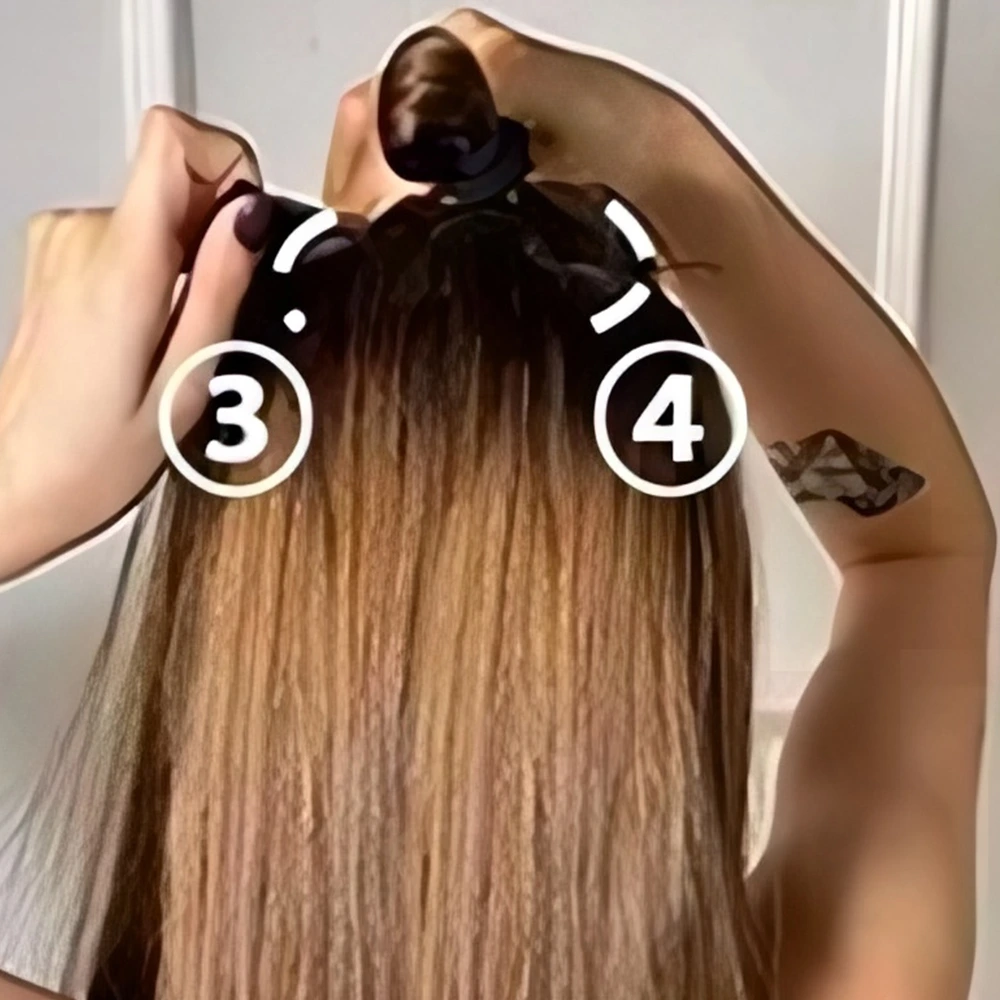
Wear 2PCS 2Clips, In both sides
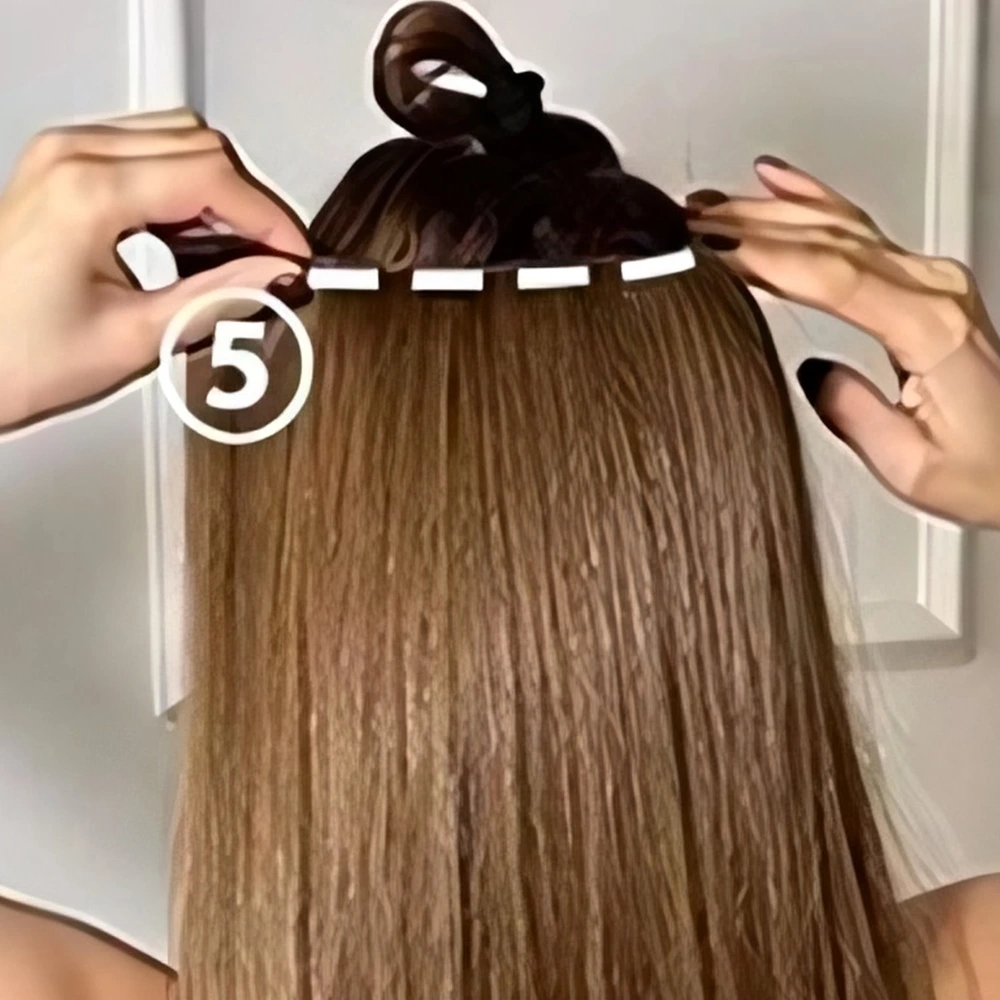
Wear IPCS 4 Clips, In the upper place
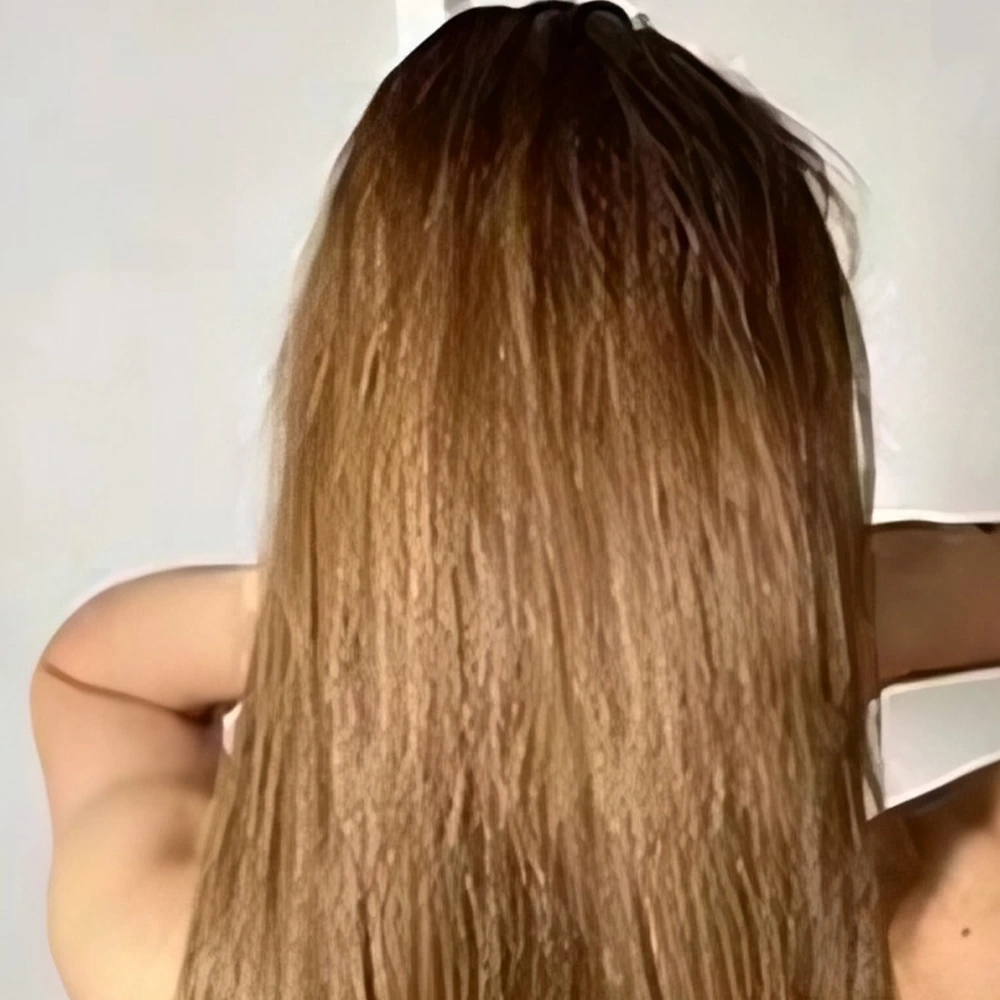
Put down your hair and Comb hair
How to Install Clip Ins Video
Wearing Precautions for Clip-in Hair Extensions
1. Pre-wearing Preparations
- Hair Cleaning: Wash clip-in hair extensions thoroughly before use to ensure they are clean and free of oils. Oil buildup can cause the clips to slip.
- Hair Condition: Ensure your hair is completely dry before installing clip-ins. Wet hair can cause clips to lose their grip and could potentially damage the extensions.
2. Key Points During Wearing
- Hair Sectioning:
- Start by sectioning your hair horizontally, from the bottom up. Create a clean, smooth part at the lower back of your head.
- Take a 1-inch thick section of hair to ensure the clips are secured tightly, preventing bulky spots or clips from failing to attach.
- Clip Installation:
- Ensure each clip is tightly connected to the weft. Check that the clips are not loose or damaged, especially with Remy and Virgin hair extensions—replace clips regularly for optimal performance. Open the clip, attach it to the inner side of your scalp, and press until you hear a “click” confirming it’s securely fastened.
- Position Adjustment:
- Position the extensions 2-3 mm away from the scalp to avoid pulling or shifting. When wearing multiple layers, space the wefts evenly to create a seamless blend with your natural hair.
Remy (cuticle-intact) hair is a quality standard for real human hair that guarantees a smooth, natural, and long-lasting result because the hair cuticles are preserved and aligned.
Virgin hair is the purest, healthiest form of human hair because it has never been treated with chemicals.
3. Post-wearing Notes
- Daily Care:
- Avoid frequent combing—especially when your extensions are wet. Use a wide-tooth comb and start from the ends to gently detangle, preventing damage.
- Apply heat protectant spray before styling to safeguard the extensions from heat damage, keeping styling tools under 150°C.
- Cleaning and Maintenance:
- Wash extensions regularly with sulfate-free shampoo and cold water to preserve their texture and longevity. Avoid vigorous rubbing and air-dry the extensions flat to prevent damage. Keep extensions out of direct sunlight while drying to prevent fading or brittleness.
- Wearing Duration and Frequency:
- Remy clip-ins last 3-6 months with proper care, while Virgin extensions can last 8-12 months, depending on daily wear and maintenance.
- Limit daily wear to under 8 hours to prevent discomfort from the weight of the extensions on your scalp.
- Special Cases:
- If you have naturally oily hair, consider replacing your extensions every 6-8 weeks to avoid oil buildup affecting clip adhesion.
- If your clips loosen or tangling occurs, replace or repair them immediately to avoid damage to your natural hair.
4. Additional Tips
- Choose extensions that match your hair’s color and texture to ensure a natural blend, especially with Virgin hair.
- Gently tug the extensions after installation to check their security. Avoid activities that involve excessive pulling, such as strenuous exercise, as it may cause them to fall out.
If you still have any questions about how to install clip in hair extensions, please contact us and we’ll help you!
You may like these:
(blog)
(blog)
blog,clipin,how to put in clip in extensions,how to put in clip in hair extensions,how to put clip extensions in,how to put clip hair extensions in,how to put clip on extensions in,how to put clip on hair extensions in,how to put clips in extensions,how to put hair clip extensions,how to put hair clip extensions in,how to put hair clips on extensions,how to put in clip in extension,how to put in hair clip in extensionshow to put it clip in hair extensions,how to put on clip extensions,how to put on extensions with clips,how to install clip in hair extensions,clip in install near me,how to install clip in extensions,clip ins install,how to install clip in weave,how to install clip ins,how to install hair clip extensions,put in clip in hair extensions,putting clip in hair extensions,putting in clip in extensions,putting in hair clip extensions,putting on clip in hair extensions